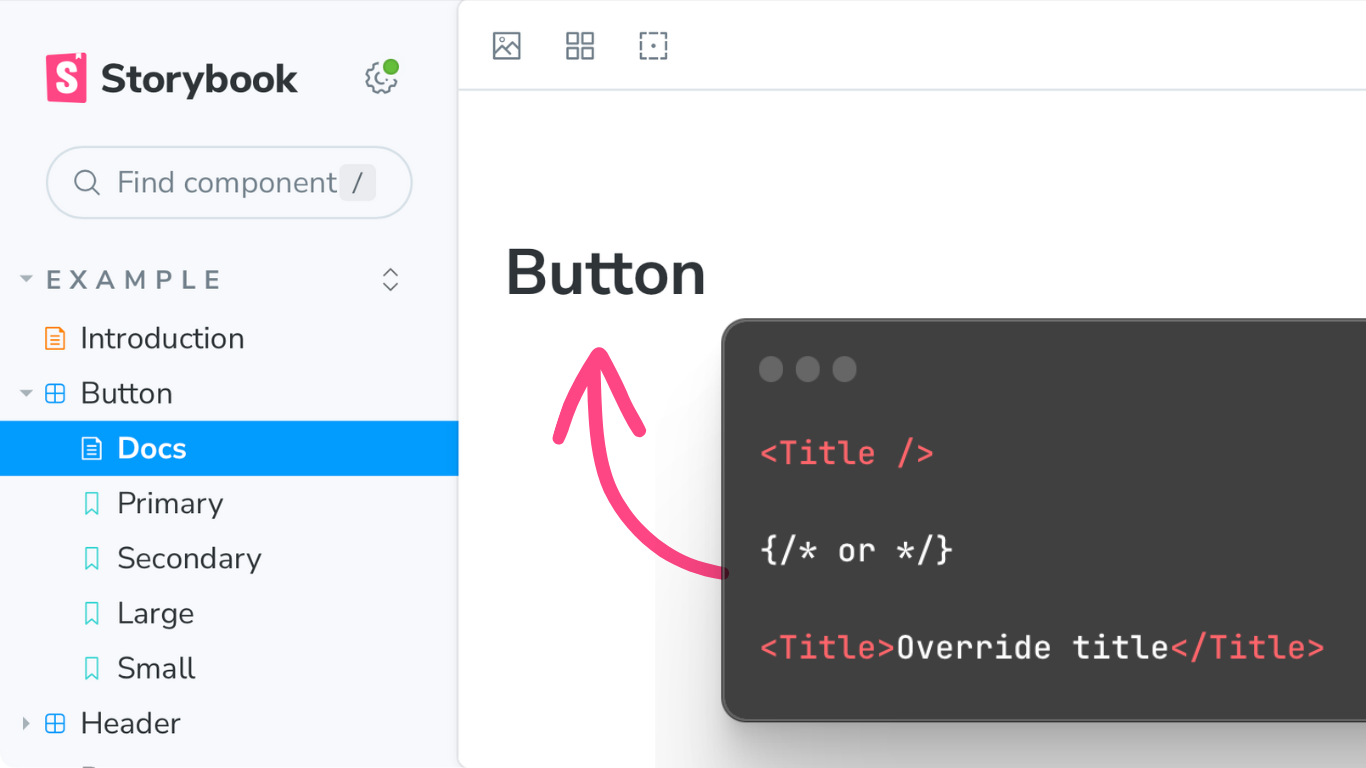
Doc blocks for component documentation
🌱 This post is in the growth phase. It may still be useful as it grows up.
Storybook doc blocks help you document and share UI components with generated interface documentation, interactive playgrounds, and copy-pasteable source code.
Let’s take a look at all the doc blocks you can use to quickly document and share UI components.
Let’s dive in…
Prerequisite
Doc blocks are used in custom docs page templates and MDX documentation.
If you’re not familiar with those Storybook features, check out these 3 minute introduction videos.
Setup
I’m working in a CSF file, using a custom docs page template.
// Found in /examples after `npm storybook init`
import type { Meta, StoryObj } from "@storybook/react";
const meta = {  title: "Example/Button",  component: Button,  parameters: {    docs: {      page: () => (        <>          {/* 👷 WORKING HERE 👷 */}        </>      ),    },  },};
export default meta;
export const Primary: Story = {  args: {    primary: true,    label: "Button",  },};
export const Secondary: Story = {  args: {    label: "Button",  },};
Generate documentation from source code
Let’s start our component documentation with title and description.
First, import doc blocks from @storybook/blocks module.
import {} from '@storybook/blocks'(I’ll leave this import block empty — with the expectation that VS Code will import named exports as I use them.)
Title
The Title component renderes a styled h1 tag.
Without props, it displays the auto-title or title, defined in component meta.
But it also accepts children if you want to override that default.

Description
The Description component renderes a styled p tag.
It displays the JSDoc comment, above the component declaration.
Earlier versions of Description took a children prop. But this option was deprecated in version 7.
{/* Uses JSDoc comment description. */}
<Description />
{/* Use of `children` is deprecated in v7, and later. */}
Subtitle
Finally, the Subtitle component renders a styled h2 tag.
Without props, it displays the component meta value para$$meters.componentSubtitle.
And it accepts children, for cust./om values.
<Subtitle />
{/* or */}
<Subtitle>Something else</Subtitle>
Short #1:
The Title, Description, and Subtitle components make it possible to keep written documentation in sync with component source code!
This is…
How to generate documentation from source code, in Storybook.
Generate copy-pasteable examples and source code
Storbook isn’t just a stickerbook of visual components. You can display source code for every story. This makes it easy for teammates to copy and paste exactly the code they need.
Story
The Story component (without props) displays your first story component directly into the document.
<Story />Source
The Source component to display a copy-pasteable snippet of the code used to produce that story.
<Source />Canvas
The Canvas component is like both Story and Source combined.
It wraps a story in a little box with a collapsable source code accordian.
<Canvas />Pass components using the of prop
All the these story components take an of prop, where we can pass a story object.
In this file, we have a Secondary story.
So let’s add Story, Source, and Canvas, for the Secondary story as well.
<Story /><Source /><Canvas /><Story of={Secondary} /><Source of={Secondary} /><Canvas of={Secondary} />Nice.
Stories
It would be a real slog to update our docs page template every time we add or remove Stories. So Storybook provides a Stories component that renders all of your stories with title and description.
<Stories />Short #2:
The Story, Source, and Canvas components give you three different ways to display your components in documentation. And they make it easy for others to copy and paste precise component source code into their projects.
This is…
How to generate copy-pasteable source code and examples in Storybook.
Genreate interactive documentation
Short #3
This is…
How to generate interactive documentation with Storybook.
Primary
And the Primary component displays a full Storybook Canvas, with the addition of these zoom and re-render buttons.
And it does so for only the first Story in Storybook.
It’s designed for use with interactive docs.
ArgTypes
Table of component props generated by TypeScript and/or JSDoc comment Learn more in (linked video)
Controls
Like the ArgTypes table with an additional Control column Where component args are set up, Controls update the Story components above. Learn more about args and controls in (linked video)
Display all stories
NO SHORT
Stories
The stories component renders all the stories contained in a story module — showing off all of the known permutations of your component. Each with the titles and descriptions of their stories.
Conclusion
I hope that you’re inspired to start communicating your components thru clear, interactive documentation, using Storybook and doc blocks.
The new reference docs on storybook.js.org are incredible. They go into details far beyond what we can cover in quick tips like this.
Video outro
If you’d like to continue learning with me, check out one of these recent videos on related component documentation topics.
That’s it for today. I’m chantastic. I’ll see you in the next one. Bye!